
How to Change Your Motorcycle Oil Step by Step

Regular maintenance is essential for keeping your motorcycle in top condition, and one of the most critical aspects of this service is changing the oil. Proper oil management ensures that your engine runs smoothly and efficiently, extending its lifespan and enhancing performance. Whether you’re a seasoned rider or a newcomer, understanding how to change your motorcycle oil is a vital skill that can save you time and money.
In this guide, we will walk you through the step-by-step process of changing the oil in your motorcycle. We will cover everything from selecting the right oil for your bike to properly disposing of the old oil. By following these straightforward instructions, you will not only gain confidence in your mechanical abilities but also contribute to your motorcycle’s overall health.
Gather your tools and materials, as we prepare to dive into the essential details of this maintenance task. With our easy-to-follow approach, you’ll have your motorcycle running on fresh oil in no time, ready to tackle the open road with vigor and reliability.
Choosing the Right Oil and Filter for Your Motorcycle
Selecting the right oil for your motorcycle is crucial for ensuring optimal performance and longevity. Begin by consulting your owner’s manual to identify the manufacturer’s recommendations regarding oil type and viscosity. Most motorcycles require either synthetic or conventional oil, with synthetic offering better protection under extreme conditions and longer intervals between changes.
When considering viscosity, you’ll typically find a range such as 10W-40 or 20W-50. The first number indicates how the oil performs in cold temperatures, while the second number refers to its performance at high temperatures. Choose a viscosity that aligns with your climate and riding habits for the best results.
The importance of the oil filter should not be overlooked. A high-quality filter traps contaminants and particles, preventing them from circulating within the engine. When purchasing a filter, opt for brands that are known for reliability and compatibility with your motorcycle model. Changing the filter during each oil change service is essential for maintaining engine health.
Additionally, consider whether your riding style demands more frequent oil changes. If you often ride in extreme conditions–such as heavy traffic or high speeds–you may need to change your oil and filter more regularly. Keeping track of your service intervals will help ensure that your motorcycle remains in peak condition.
Tools and Equipment Needed for an Oil Change
To successfully complete the oil change service on your motorcycle, you’ll need a few essential tools and equipment. Having the right items on hand will ensure that the process is smooth and efficient.
1. Oil Filter Wrench: This tool is specifically designed to remove and install oil filters. It provides the necessary grip to safely turn the filter without causing damage. If your motorcycle has a tight space around the filter, consider getting a wrench that can access those hard-to-reach areas.
2. Socket Set: A good socket set is crucial for removing the oil drain plug and securing it back in place. Make sure to have the appropriate sizes for your motorcycle, as these can vary widely between models.
3. Torque Wrench: Proper torque is essential when tightening the drain plug and oil filter. A torque wrench ensures that you apply the correct amount of force, preventing leaks and potential damage to the components.
4. Oil Drain Pan: To catch the old oil as it drains out, an oil drain pan is indispensable. Look for a pan that can hold enough oil and has a spout for easy pouring or disposing of the used oil.
5. Funnel: A funnel is helpful for pouring new oil into the engine without spilling. It allows for better precision and minimizes mess during the service.
6. Clean Rags or Shop Towels: Keeping your workspace clean is important. Use rags or towels for wiping up any spills and for cleaning your hands during the process.
7. New Oil: Selecting the correct type and grade of oil for your specific motorcycle is essential. Refer to your owner’s manual for recommendations to ensure optimal performance.
8. New Oil Filter: Always replace the oil filter during an oil change. This helps to keep the oil clean and maintains the efficiency of your motorcycle’s engine.
By having these tools and equipment ready before you begin the oil change, you can ensure a thorough and effective service that contributes to the overall health of your motorcycle.
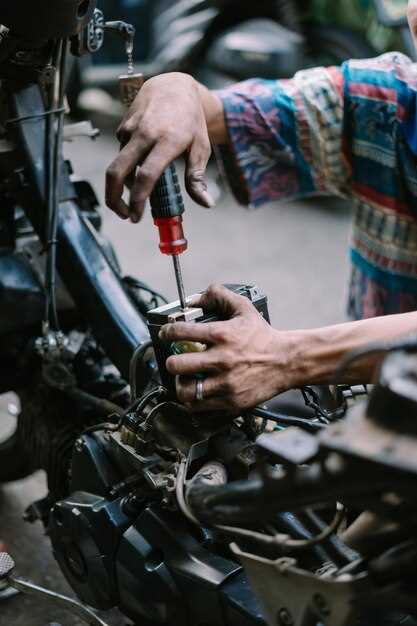
Performing the Oil Change: A Detailed Walkthrough

Changing the oil in your motorcycle is an essential maintenance procedure that ensures optimal performance and longevity. Follow these detailed steps to successfully complete an oil change.
1. Gather Necessary Tools and Materials
Before you begin, collect all required items including a new oil filter, the appropriate grade and amount of motorcycle oil, a funnel, an oil catch pan, and a wrench set. It is important to use oil that meets your motorcycle’s specifications.
2. Prepare the Motorcycle
Park your motorcycle on a level surface and turn off the engine. Allow it to cool down for a few minutes to prevent burns. Engage the kickstand and place a cloth or towel under the engine to catch any spills that may occur during the oil change.
3. Drain the Old Oil
Locate the oil drain plug beneath the motorcycle. Using the correct wrench, carefully unscrew the plug and allow the old oil to drain completely into the catch pan. This may take several minutes. Once drained, replace the drain plug and ensure it is securely tightened.
4. Replace the Oil Filter
Next, locate the oil filter. Using an oil filter wrench, remove the old filter. Before installing the new filter, apply a thin layer of new oil to the rubber gasket of the new filter. This will help create a better seal. Screw the new filter into place by hand until it is snug, but do not overtighten.
5. Add New Oil
Using a funnel, pour the new oil into the engine through the designated oil fill hole. Refer to your motorcycle’s manual for the correct oil capacity. After filling, replace the oil fill cap securely.
6. Start the Engine
With the oil change complete, start your motorcycle and let it run for a few minutes. This allows the new oil to circulate throughout the engine. Check the oil level using the dipstick or sight glass and add more oil if necessary.
7. Dispose of Old Oil Properly
Finally, properly dispose of the old oil and oil filter. Many auto parts stores offer recycling services for used oil, ensuring it is handled environmentally responsibly.
By following these steps carefully, you can perform an effective oil change on your motorcycle, maintaining its performance and extending its lifespan.