
How to Clean and Maintain a Motorcycle Air Filter

Your motorcycle’s performance heavily relies on the quality of its air intake system, and the air filter plays a crucial role in this process. A clean air filter ensures that your engine receives the optimal amount of clean air necessary for efficient combustion. Over time, dirt, dust, and other debris accumulate in the filter, restricting airflow and ultimately impacting engine performance.
Regular maintenance of your motorcycle’s air filter is essential not only for enhancing performance but also for prolonging the lifespan of your engine. In this guide, we will explore various methods for cleaning and maintaining air filters, examining both foam and paper types. Understanding the specific needs of your motorcycle’s air filter will enable you to keep it in peak condition and enjoy a smoother ride.
We will also discuss the signs indicating that your air filter needs attention, the tools required for cleaning, and best practices to follow for maintenance. With the right approach, maintaining your air filter can be a straightforward task that contributes significantly to your motorcycle’s overall efficiency and reliability.
Step-by-Step Process for Cleaning Foam and Paper Filters
Cleaning motorcycle air filters is essential for optimal performance and longevity. Here’s a detailed guide to maintaining foam and paper filters effectively.
Cleaning Foam Filters:
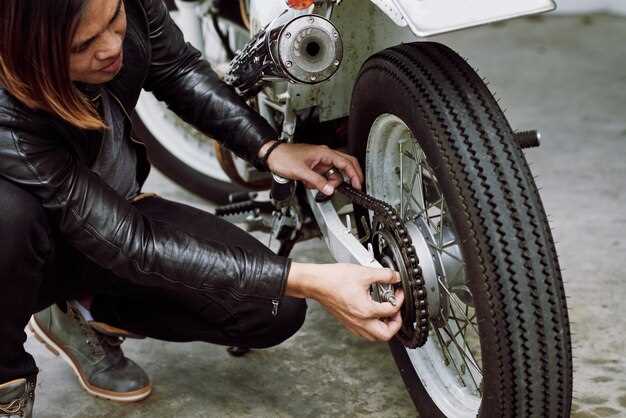
Step 1: Remove the Filter – Begin by carefully removing the foam filter from the airbox. Check for any screws or clips that may be holding it in place.
Step 2: Rinse with Water – Rinse the filter under warm water to remove loose dirt and debris. Avoid using high-pressure water, as it may damage the foam material.
Step 3: Apply Cleaner – Use a dedicated foam filter cleaner, spraying it generously onto the filter. Allow it to sit for a few minutes to break down the dirt.
Step 4: Scrub Gently – Using a soft brush, gently scrub the filter to remove any remaining grime. Be cautious to maintain the integrity of the foam.
Step 5: Rinse Again – Rinse the filter thoroughly under running water until all cleaner is washed away, ensuring no residue remains.
Step 6: Dry the Filter – Allow the filter to air dry completely. Do not use heat, as this may cause the foam to deteriorate.
Step 7: Re-oil the Filter – Once dry, apply a foam air filter oil evenly across the surface. This will help to trap dirt and enhance filtration.
Step 8: Reinstall the Filter – Once the filter is oiled and dried, carefully reinstall it back into the airbox, securing it properly.
Cleaning Paper Filters:
Step 1: Remove the Filter – Start by removing the paper filter from its housing, taking care not to damage it.
Step 2: Inspect for Damage – Check the filter for any tears or significant wear. If damaged, replacement is recommended as cleaning won’t restore functionality.
Step 3: Tap Off Loose Dirt – Gently tap the filter on a hard surface to dislodge loose dirt and dust. Avoid brushing, as this may tear the paper fibers.
Step 4: Use Compressed Air – If available, use compressed air to blow out remaining debris. Hold the filter at a safe distance to prevent damage.
Step 5: Avoid Water or Cleaners – Do not rinse or soak paper filters, as this can ruin their structure. Cleaning agents can also break down the filter material.
Step 6: Inspect and Reinstall – After cleaning, inspect the filter one more time for integrity before reinstalling it in the airbox, ensuring a tight and secure fit.
Regular maintenance of both foam and paper filters will safeguard your motorcycle’s engine and improve performance. Following this step-by-step guide ensures that each filter remains in optimal condition for your riding adventures.
When and How Often to Replace Your Motorcycle Air Filter
Maintaining your motorcycle’s performance requires regular attention to various components, and the air filter is a crucial part of this equation. The air filter plays a vital role in ensuring that the engine receives clean air for optimal combustion. Over time, this filter can become clogged with dirt, debris, and other contaminants, which can negatively impact performance. Knowing when and how often to replace your motorcycle air filter will help ensure your bike runs smoothly.
Generally, you should replace your motorcycle air filter:
- Every 12,000 miles (19,300 kilometers) or every 12 months, whichever comes first.
- More frequently if you ride in dusty or off-road conditions.
- If you notice a drop in engine performance, such as reduced acceleration or poor fuel economy.
To ensure your air filter is functioning properly, follow these steps for inspection and replacement:
- Check the owner’s manual: Always refer to your motorcycle’s manual for manufacturer recommendations on filter replacement intervals.
- Visual inspection: Remove the air filter and visually inspect it for dirt or damage. A clogged filter will appear excessively dirty or discolored.
- Clean if reusable: If your air filter is washable, clean it according to the manufacturer’s instructions using appropriate cleaning solutions.
- Replace if necessary: If the filter is damaged or beyond cleaning, replace it with a new one. Ensure it matches the specifications of your motorcycle model.
- Reassemble and test: After maintenance, securely reassemble all components and start your motorcycle to ensure everything functions correctly.
Adhering to these maintenance guidelines for your motorcycle air filter will not only prolong the life of your engine but also enhance overall performance and efficiency.
Common Mistakes to Avoid During Air Filter Maintenance
One frequent mistake is neglecting to clean the air filter regularly. Over time, dirt and debris can accumulate, restricting airflow and negatively affecting engine performance. Establish a routine cleaning schedule based on your riding conditions.
Another common error is using the wrong cleaning products. Many motorcycle enthusiasts mistakenly use harsh solvents that can damage the filter material. Always opt for products specifically designed for air filter maintenance to ensure longevity and effectiveness.
Failing to properly dry the air filter after cleaning is a significant mistake. Moisture left in the filter can lead to bacteria growth or deterioration of the filter material. Be sure to allow the filter to dry completely before reinstalling it.
Using excessive oil during the re-oiling process is also a prevalent issue. Over-oiling can cause the filter to become clogged and may allow excess oil to enter the intake system, potentially damaging the engine. A light, even application is essential.
Lastly, forgetting to inspect the air filter for signs of damage can lead to performance issues. Regularly check for tears or worn areas, as these can result in unfiltered air entering the engine, causing long-term harm. Replace the filter as needed to maintain optimal performance.